What’s in My Camera Bag? The 16 Best Travel Photography Gear for Travel YouTubers and Content Creators
As YouTubers and social media content creators, we’ve had the privilege of exploring various travel photography gear in our quest for the perfect setup. Throughout our years in content creation, we’ve embraced some tools while letting go of others, all while refining our craft.
In this article, we’ll delve into the top 16 photography gear essentials for travel YouTubers and Content Creators. These valuable resources can be utilized whether you’re on the road or capturing moments closer to home. So let’s unpack our bag and dive right in!
Travel Photography Gear
Mirrorless Camera Sony A7Riii
The most important of all travel photography gear. It’s on this that most of the magic happens.
The Sony A7Riii has been in our arsenal for over 2 years already. This camera has traveled with us to Japan and the Philippines and is what Waseem uses for his real estate, travel photography, and videography business.
The camera boasts a whopping 42.4 megapixels for ultra-high-resolution photos. For a quick reference, our previous camera which was the Sony a6500 shot 24.2 megapixels. You’ll begin to realize how much better the quality of the photos looks.
Not only is the camera a great photography piece, but it is also great for videography applications. Most travel videos you will see on our YouTube channel are shot on this camera. The camera shoots up to 4K at 30fps or 1080p at 120fps. 120 fps will give you that super slo-mo look to your videos.
We opted to choose this camera as it does well for both travel photography and videography. There are alternatives on the market that offer similar results but Sony does mirrorless technology well in a nice compact body. The a7Riii is a nice versatile camera that is great for pictures as well as videos.
Camera Backpack Lowepro ProTactic 450 AW
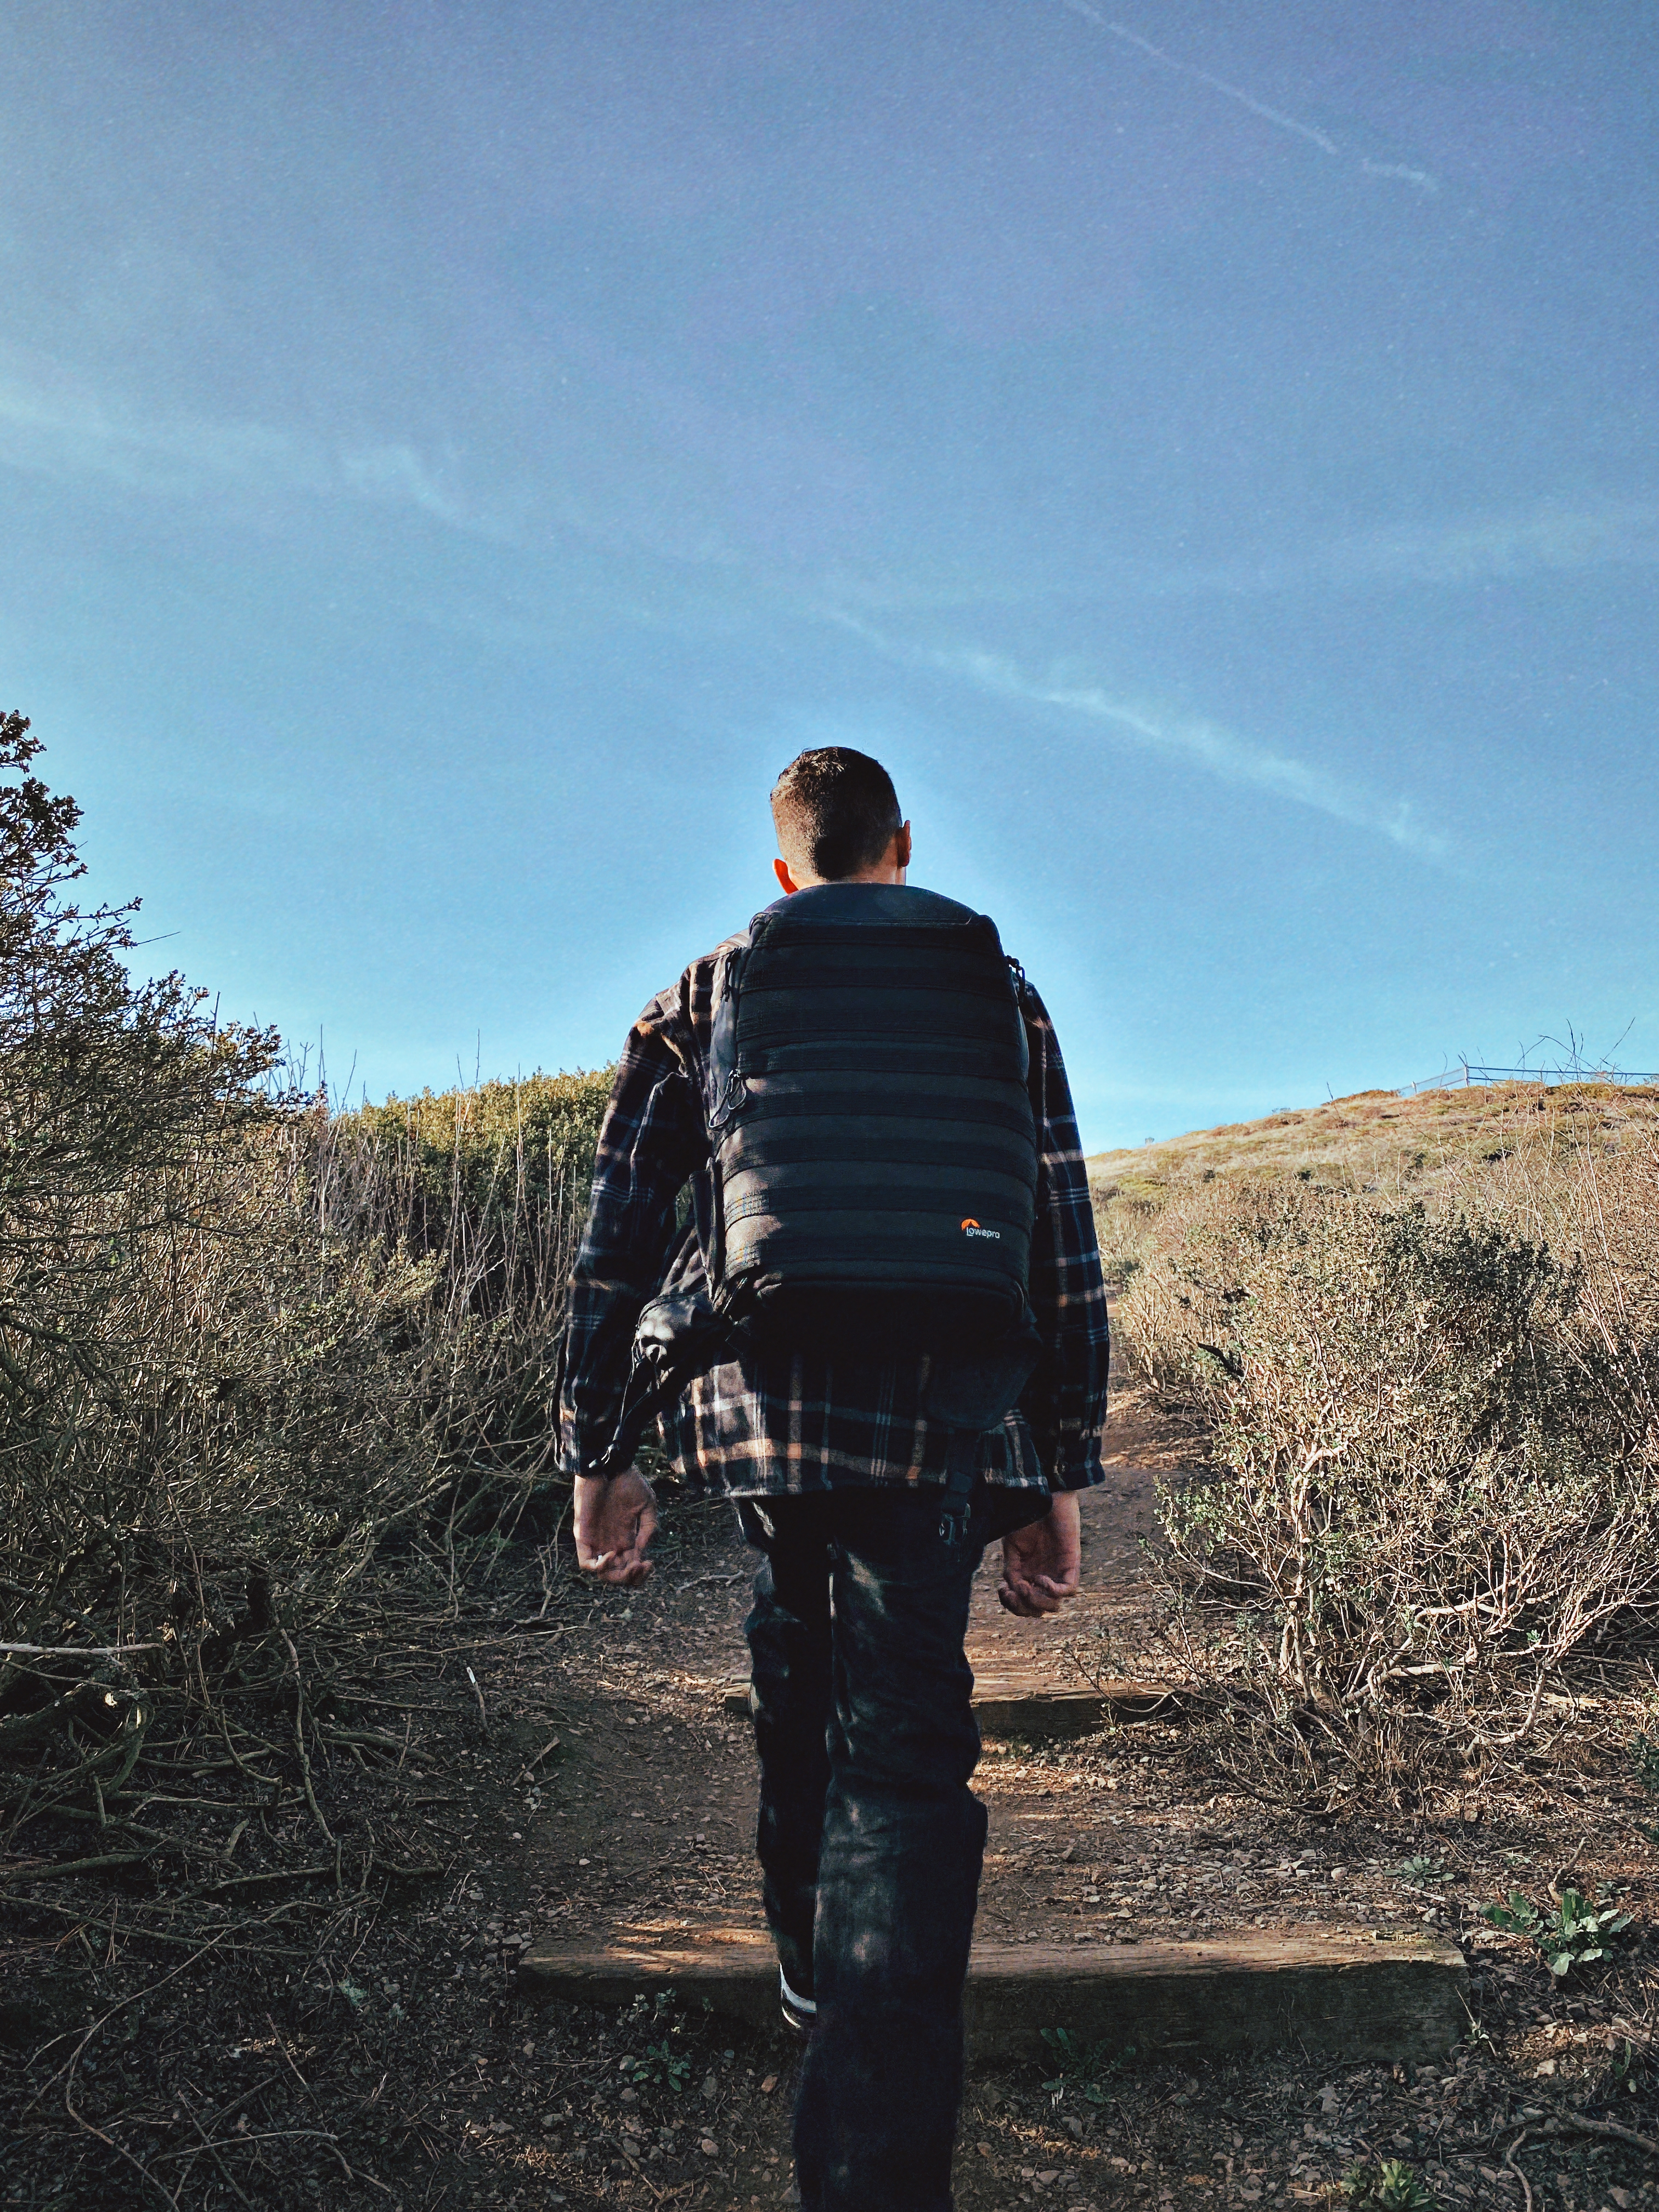
This camera backpack has weathered through a lot over the years. It has carried our camera equipment through Africa, Europe, and Southeast Asia and is still holding up.
The Lowepro brand makes for some good quality backpacks and the 450 AW which is the largest of the bag sizes can carry a lot more gear than you probably think.
With our trips, we are able to fit our camera body with a lens attached, 2 extra lenses, camera batteries, chargers, a DJI Mavic Pro drone, wires that could be placed in the pouches, and most importantly, a laptop. Yes, the bag can accommodate laptops up to 15 inches.
The bag comes with multiple pouches and add-ons like a removal tripod holder or pouch which is fully customizable. There are several belts and clips which we haven’t gotten around to trying out.
As for the durability of the bag, it is well-built with an included rain cover. It may be a challenge to locate it but it is stitched to the bottom of the bag where the bag sits. It is stitched on so you know to never forget it and it is placed in an area that is well out of your way.
The bag has paddings to allow support for your back and also straps that allow you to have some much-needed support if you’re carrying around some heavy gear. A Must-Have, if you’re going to be carrying all the travel photography gear we’re mentioning.
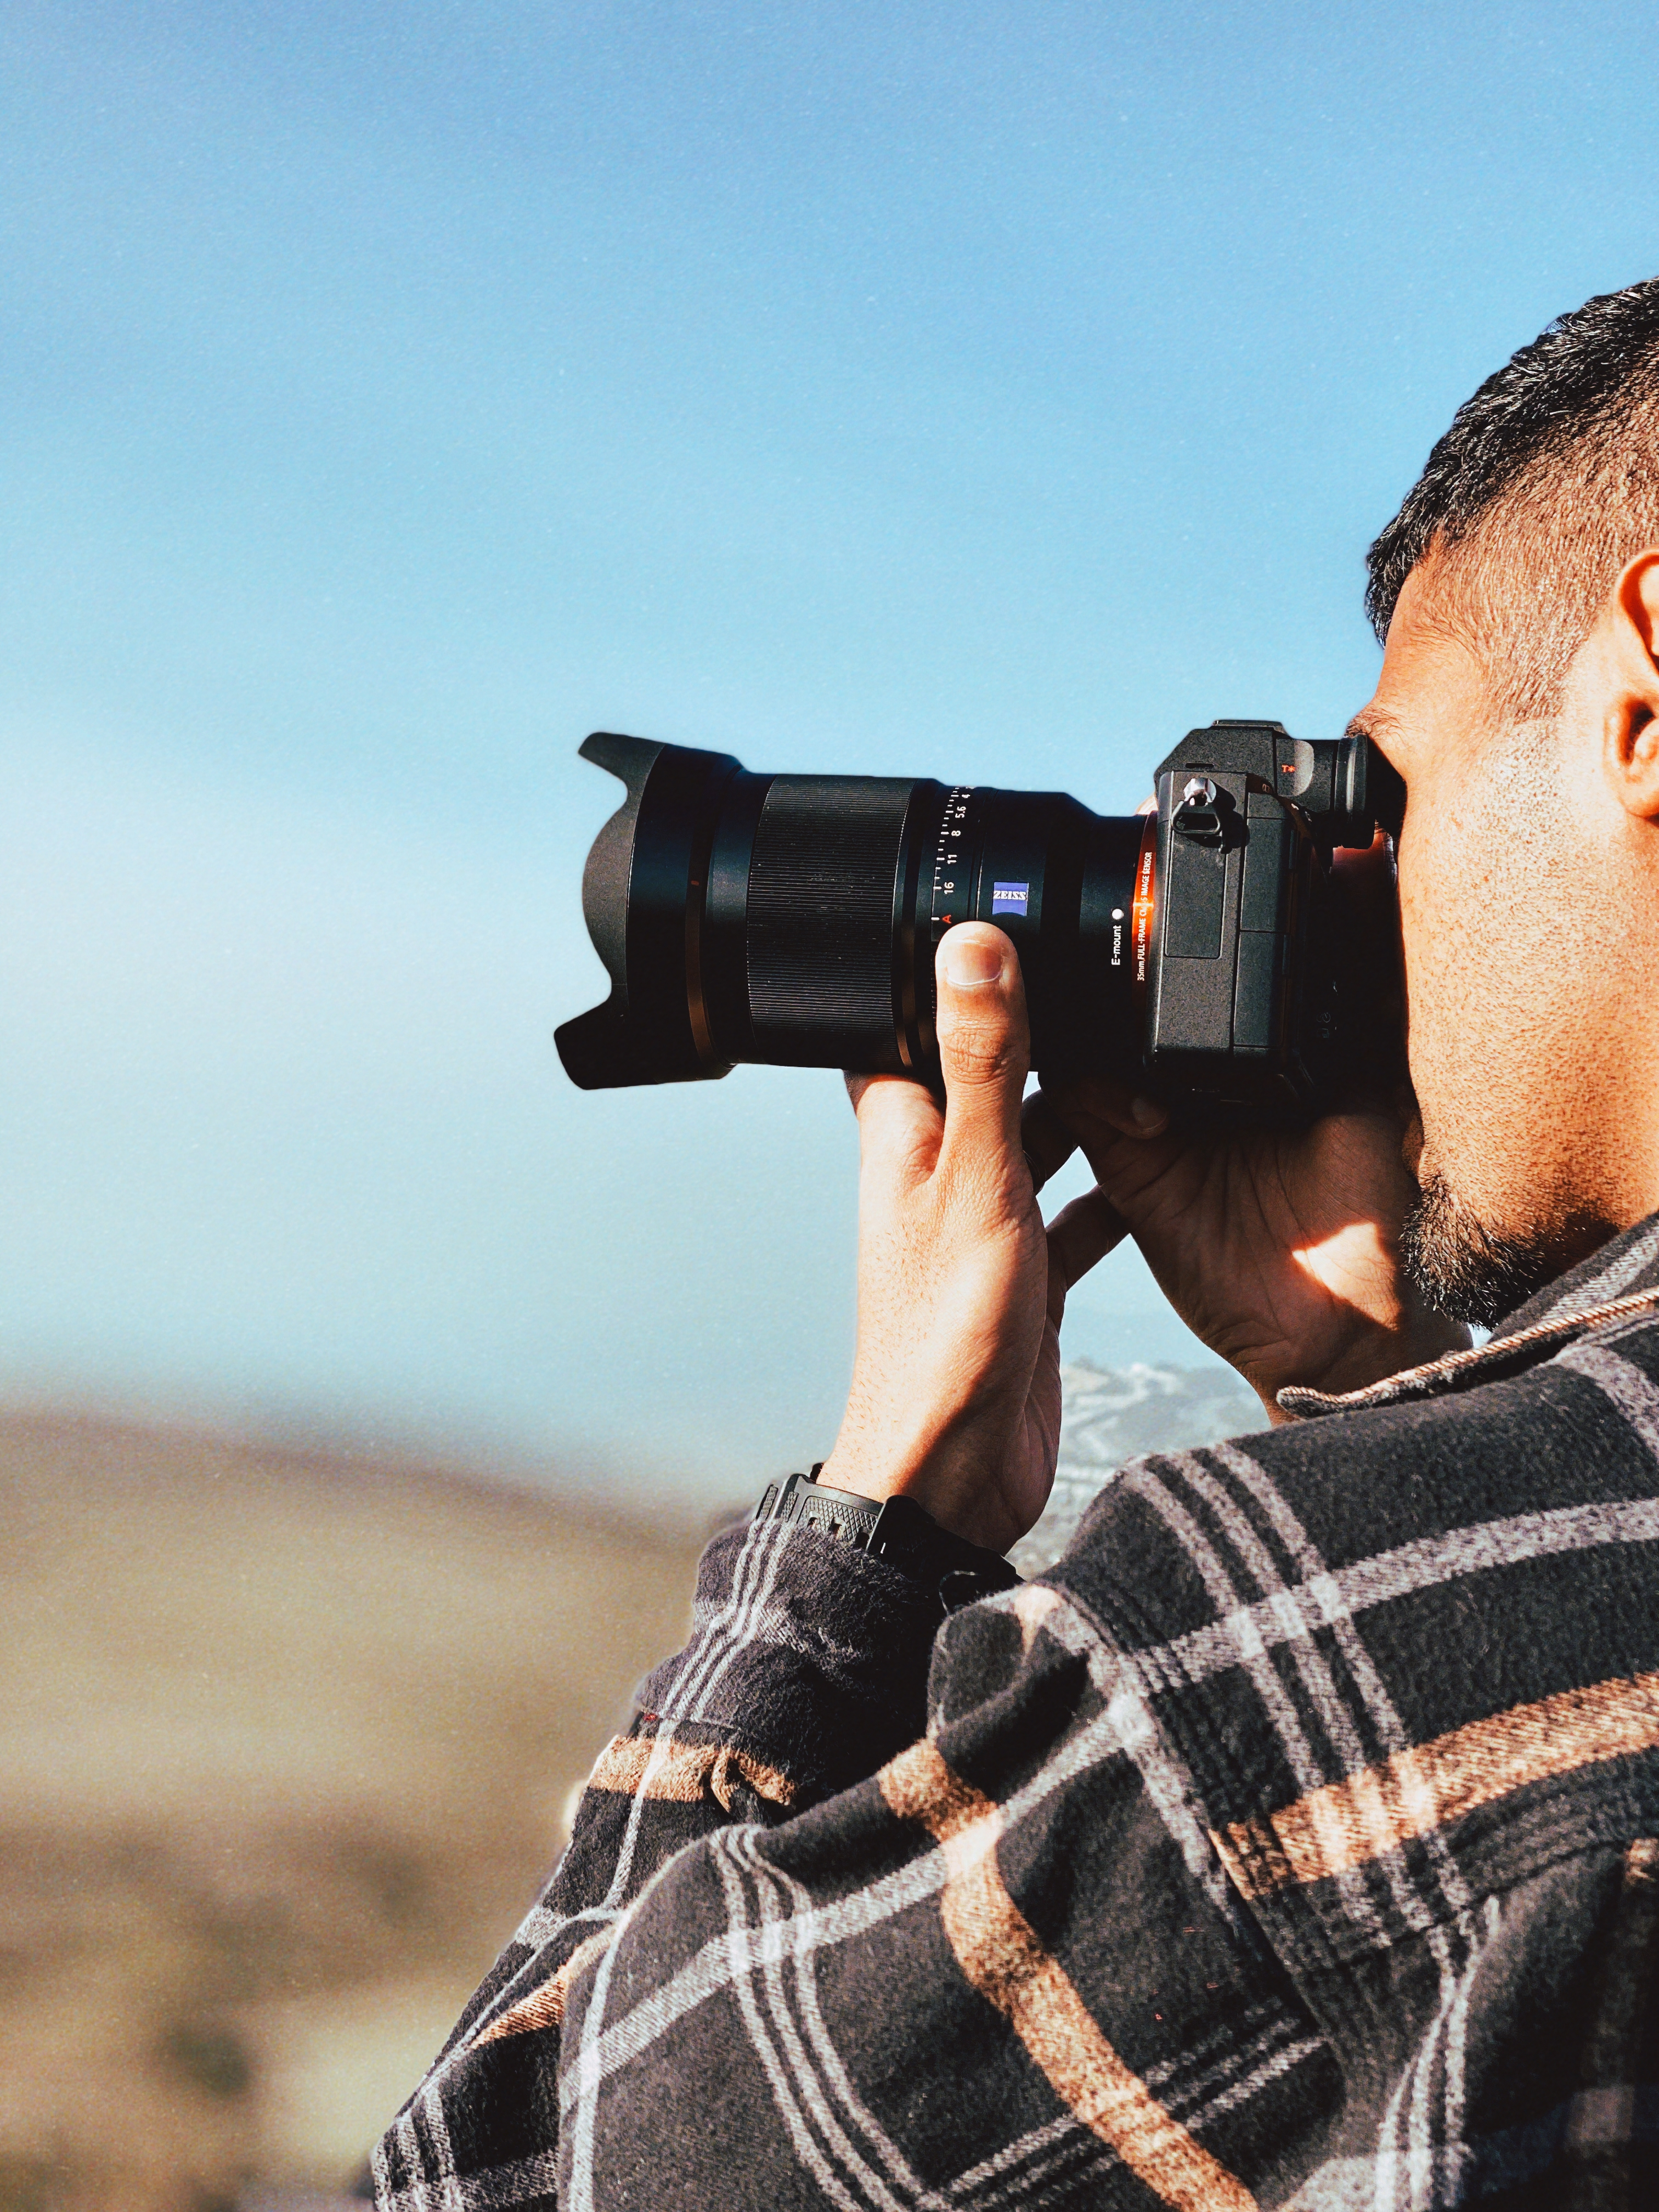
Our Favorite Lens! Sony Zeiss 35mm f1.4
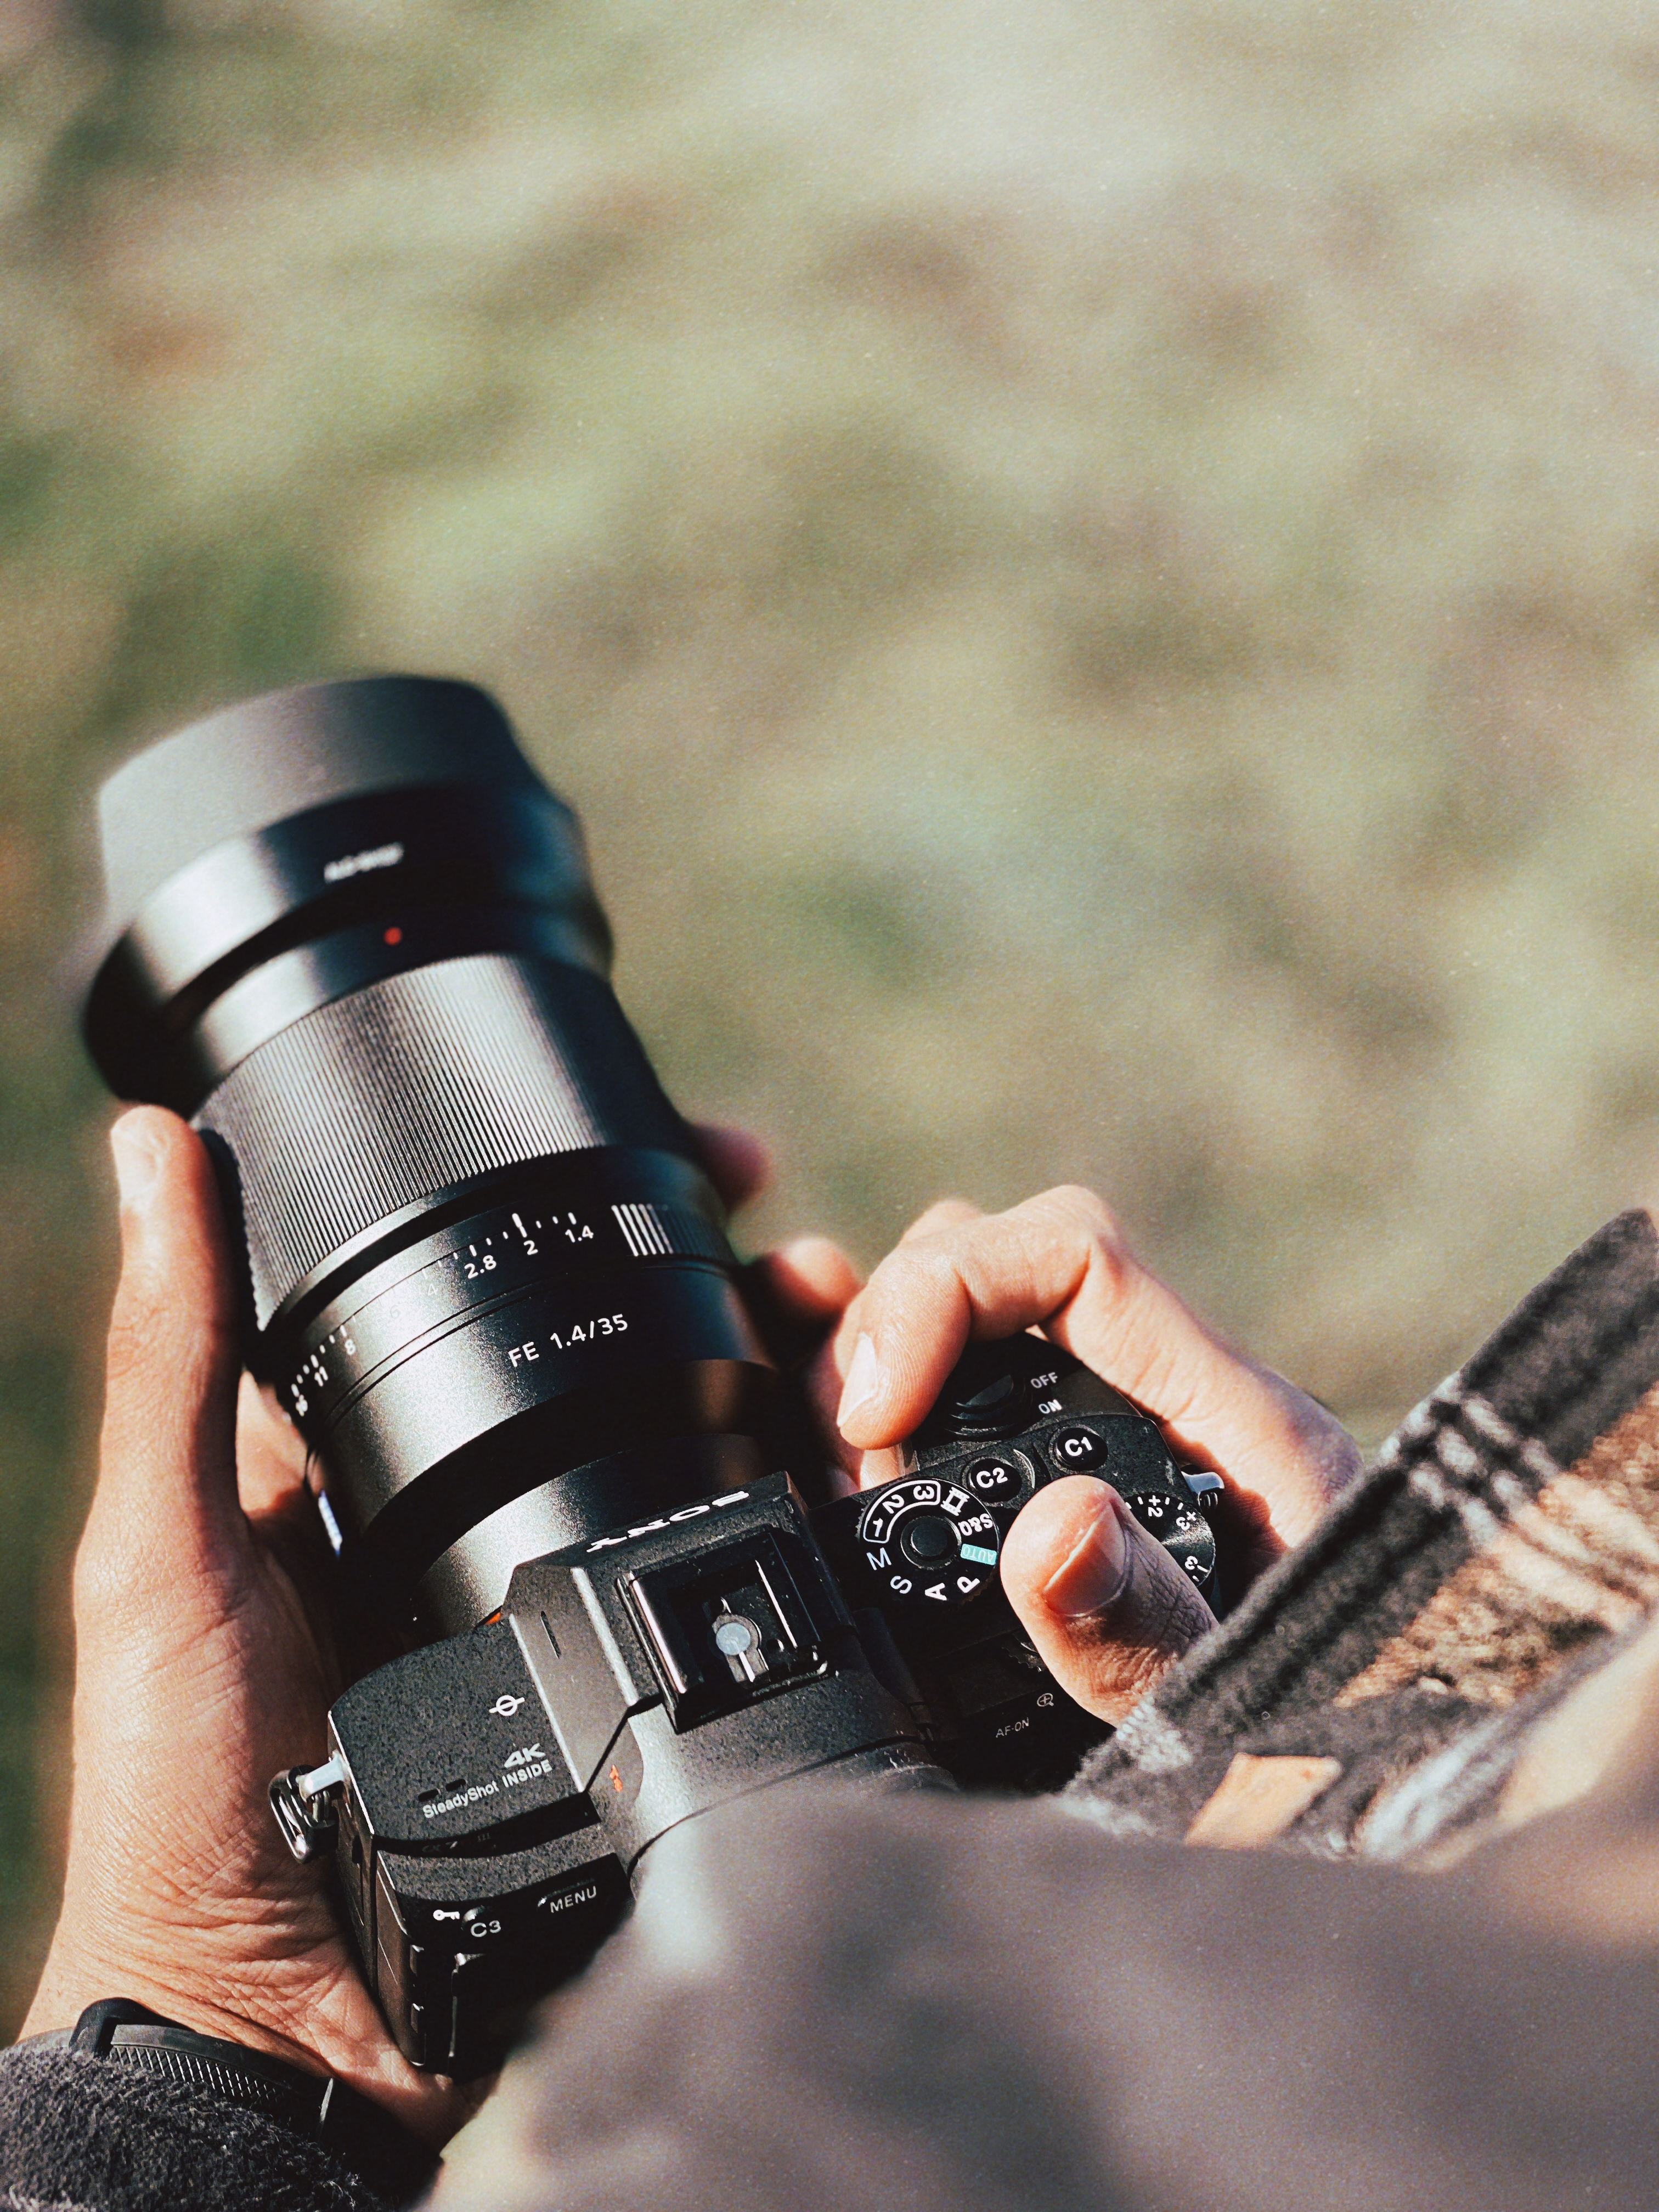
Not only does this lens have great bokeh, but it instantly turns ordinary shots into artistic ones! Well obviously you have to compose a scene for a shot to be justifiable for your viewers but the f-stop of 1.4 really shines for this lens.
The focal length of 35mm is perfect for shots out and about and is just shy of 50mm which is the ideal focal length at which a human eye sees the world. The 35mm is just wide enough to capture the surroundings but not too wide to the point where you start to get the fisheye effect and curvature around the edges.
We have used this lens for in-home sit-down videos and definitely recommend it for your vacation pictures as it really makes your subject pop from the background.
This is a prime lens meaning the focal length of 35mm is fixed so having a zoom feature is unavailable. But that is where the art comes out with a prime lens as you make use of your feet to get closer or further away from the subject to get that shot.
Wide lens Sony G-Master 12-24mm f4
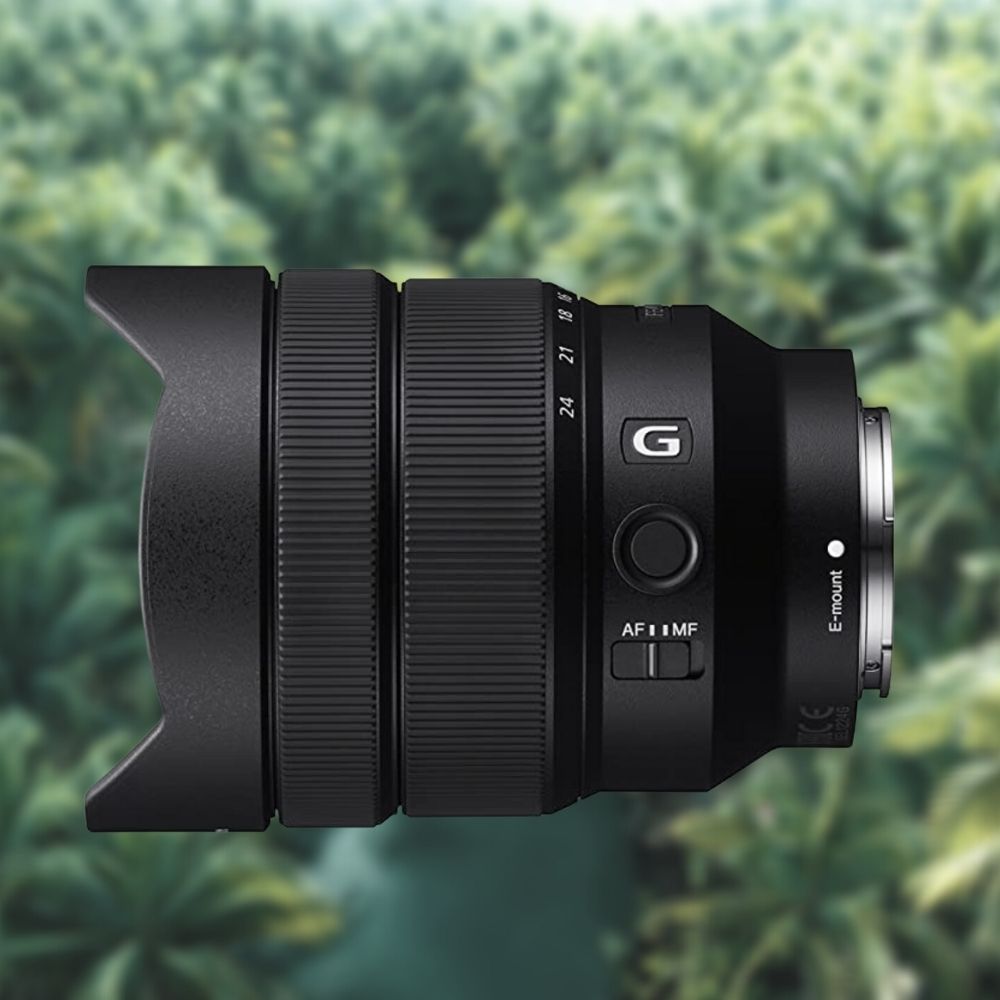
Our landscape and indoor photography lens! We have also used this lens for our YouTube videos, punching in the focal length to 19mm all the way to 24mm.
A 12mm lens may get a bit too wide for head shots as the ends of the lens may distort your subject making you look like an alien. However, if you’re doing landscape photography, then the wide focal will come in handy.
It’s also great for indoor shots where getting coverage of a tight indoor space may be a challenge for tighter lenses, the wide-angled Sony G-Master 12-24mm f4 can get the job done with flying colors.
In early 2020, Sony released the f2.8 version of this lens which gives it that f2.8 aperture rating. If you’re really picky about your noise levels, then the f2.8 would give you that wider aperture to allow more light in, but if the price tag is not worth it, then you need to at least pick up the f4 version.
Telephoto lens Sony 70-200mm f2.8
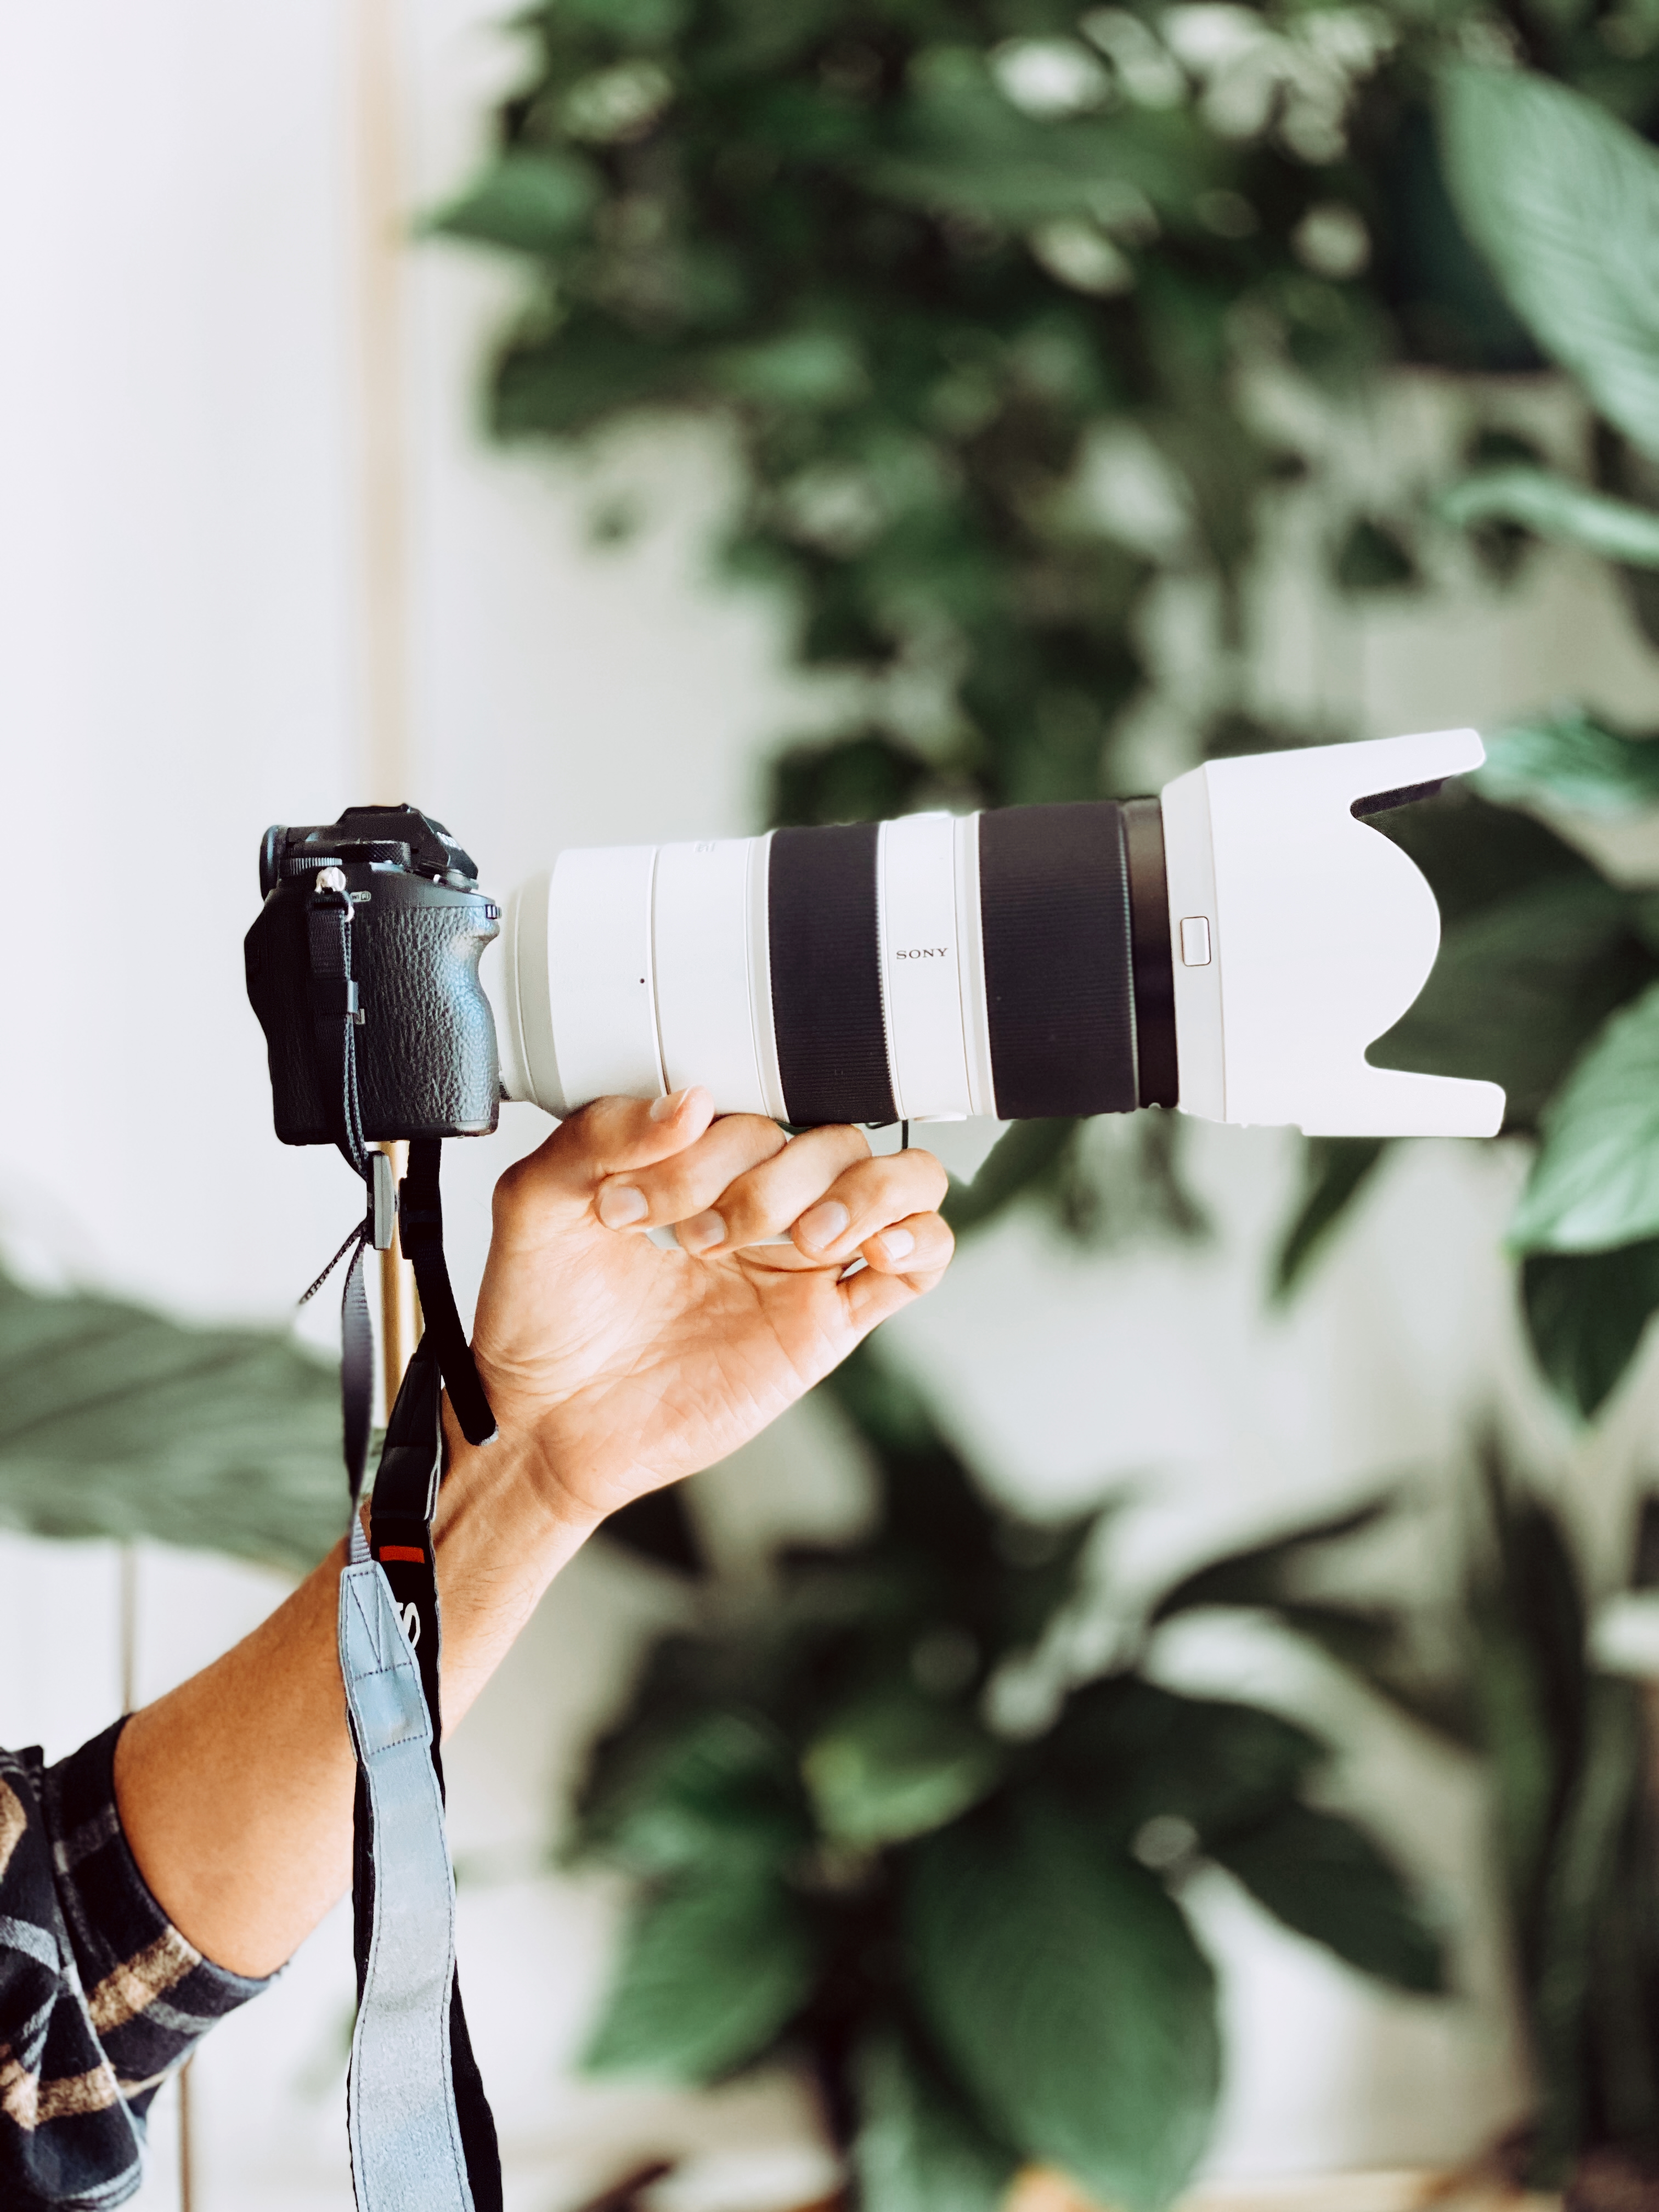
We picked this lens up this past Black Friday sale in the U.S. for a nice deep discount. Almost $200 off the original sticker price.
We chose this lens mainly for its given focal length range of 70-200mm. This is enough to get in close to your subject without having to travel the distance or interrupt the scene as most wildlife photographers try to avoid.
The lens is ideal for headshots and portrait sessions as it punches into the subject without distortion and gives the subject a flattering look instead of making them look big and wide which wide lenses normally do.
We chose an F2.8 aperture over the F4 since we’re going to be doing portraits of people. The needed bokeh (background blur) for portraits would really complement the picture.
| Tip: The lower the f stop, for example, f1.4, 1.8, 2.8, the more background blur you will get. The higher the f stop, for example, f4, f5.6, or f11, then the less blurry your background will be. |
Drone DJI Mavic Pro 2
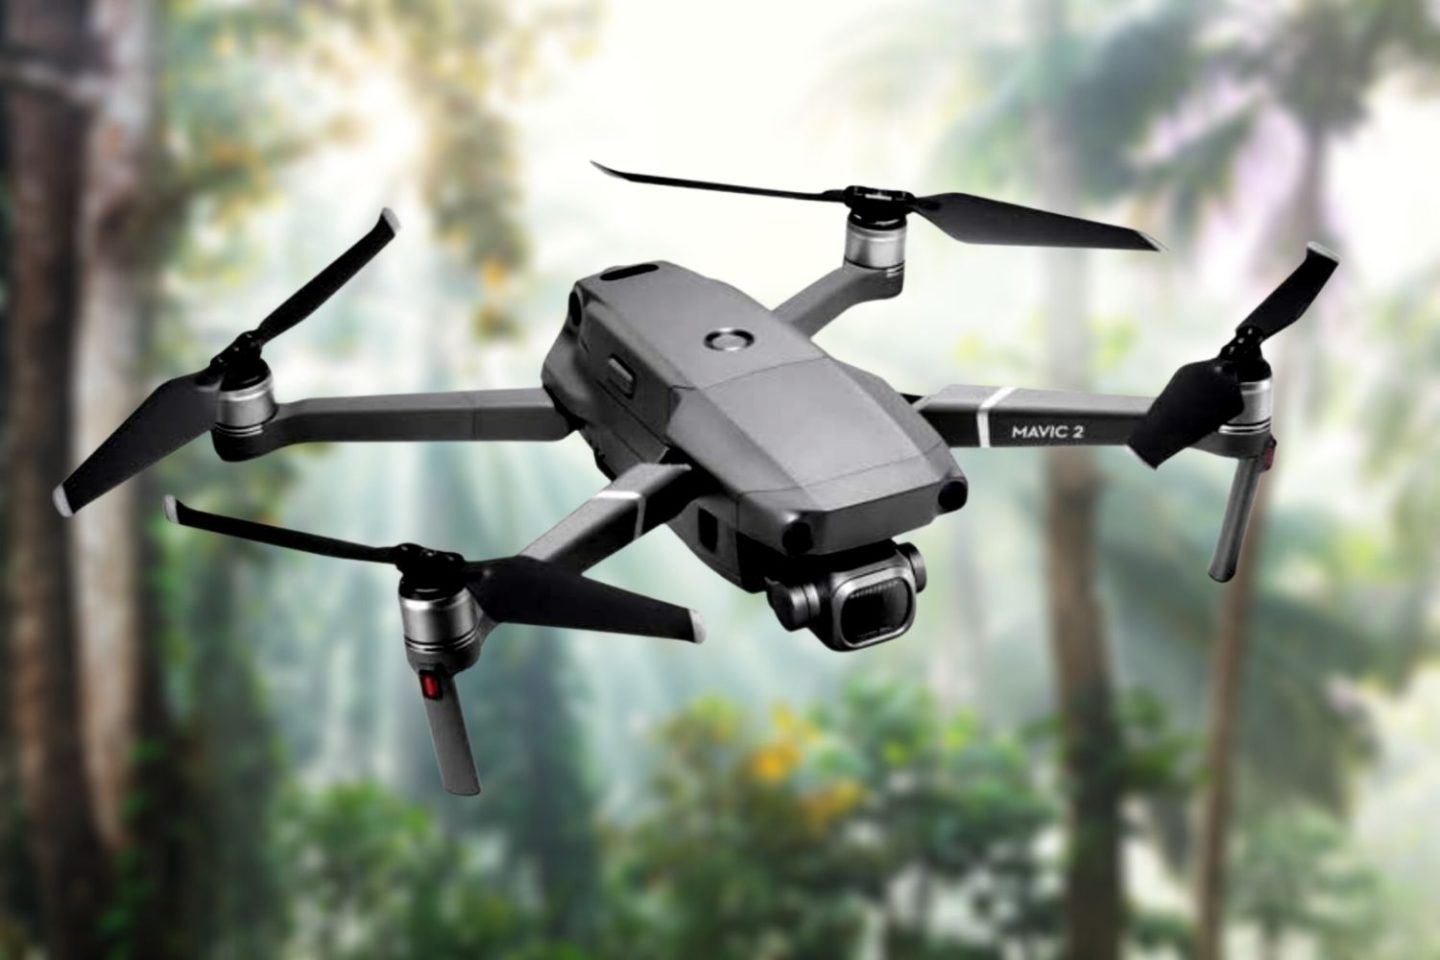
The DJI line of drones has to be one of the best on the market. It is no wonder DJI actually dominates a large portion of the market given their reliable technology and great innovation.
Over the years DJI has come out with various products that include their drone, gimbals, and cameras. We’ve used the DJI original Mavic Pro which was a great drone for its time.
Since its release, DJI has continuously improved its products so we have since then switched to the Mavic Pro 2 which is a stunning drone to own.
The biggest factor for us has been the portability of a drone. To fold a drone up and essentially put it inside a corner of your bag is remarkable.
Not only have drones gotten smaller but the technology in them has become much more advanced.
The Mavic 2 Pro is attractive as it has what its predecessor did not and that is 10-bit color. 10-bit color contains a considerably higher amount of color compared to a lower 8-bit codec. That means more flexibility in the editing room as you’re applying different grades to your footage. Videos can be shot up to 4K Ultra HD.
Photography on the Mavic 2 Pro shines with the 1-inch sensor capturing more light and allowing for less noise. The Hasselblad camera captures up to 20 megapixels and shoots stunning HDR images.
If you’re contemplating purchasing a drone, we would advise you to go with the pro as the image quality is superior to some of the drones DJI offers. However, if you’re a beginner and would seldom fly, then the DJI Mavic Mini or the DJI Mavic Air 2 (newest) would do the job.
What’s in my Camera Bag?
Action Cam GoPro Hero 8 Black
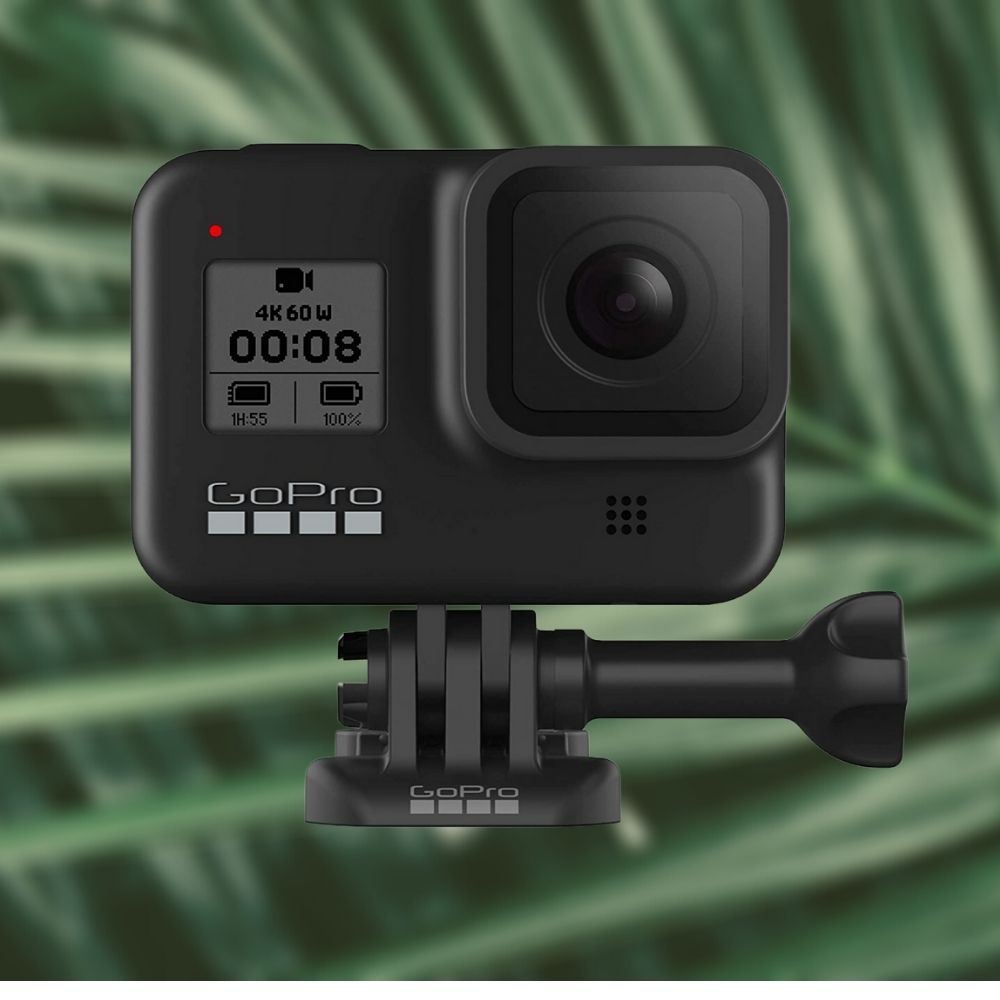
We had to eventually part ways with our Hero 4 Black due to the lack of a screen and no stabilization feature. The HERO 8 Black solves all of this with their (now 1-year-old camera).
The latest launch from GoPro has been the Hero 9 which now includes a selfie screen allowing you to see yourself and frame the shot before hitting capture.
The HERO 8 Black is still a great camera to own as it includes hypersmooth 2.0 which takes the jitters out of your videos.
The photo feature captures great HDR images that have a well-balanced exposure which you can post straight to your social media without much editing or none at all.
It also has time warp 2.0 which is basically a timelapse and hyperlapse infused into one. It makes for some great content.
The biggest factor for a GoPro is its application. With a camera so small, you can mount it basically anywhere. Be it on bikes, snowboards, surfboards, or on your helmet, use it as a dash cam, stick it in a tree, you name it, a GoPro can be used for it. And the best thing is that it is waterproof.
Our previous Hero 4 Black needed to have a waterproof housing. We had to be super cautious as to how we placed it in there making sure the seal was tight before we took the dive.
With the new GoPros, you don’t have to worry about it since the unit itself is waterproof which means you can take the GoPro out for a swim right out of the box!
The newer GoPros now introduce a touch-sensitive screen that allows you to scroll through the menus and make your selection.
If you’re used to virtual assistant services like Siri, Alexa, or Google, then we’re pleased to inform you that GoPro has a voice-activated command as well! All you have to say is “GoPro, start recording” or “GoPro, turn off”.
GoPro Stick
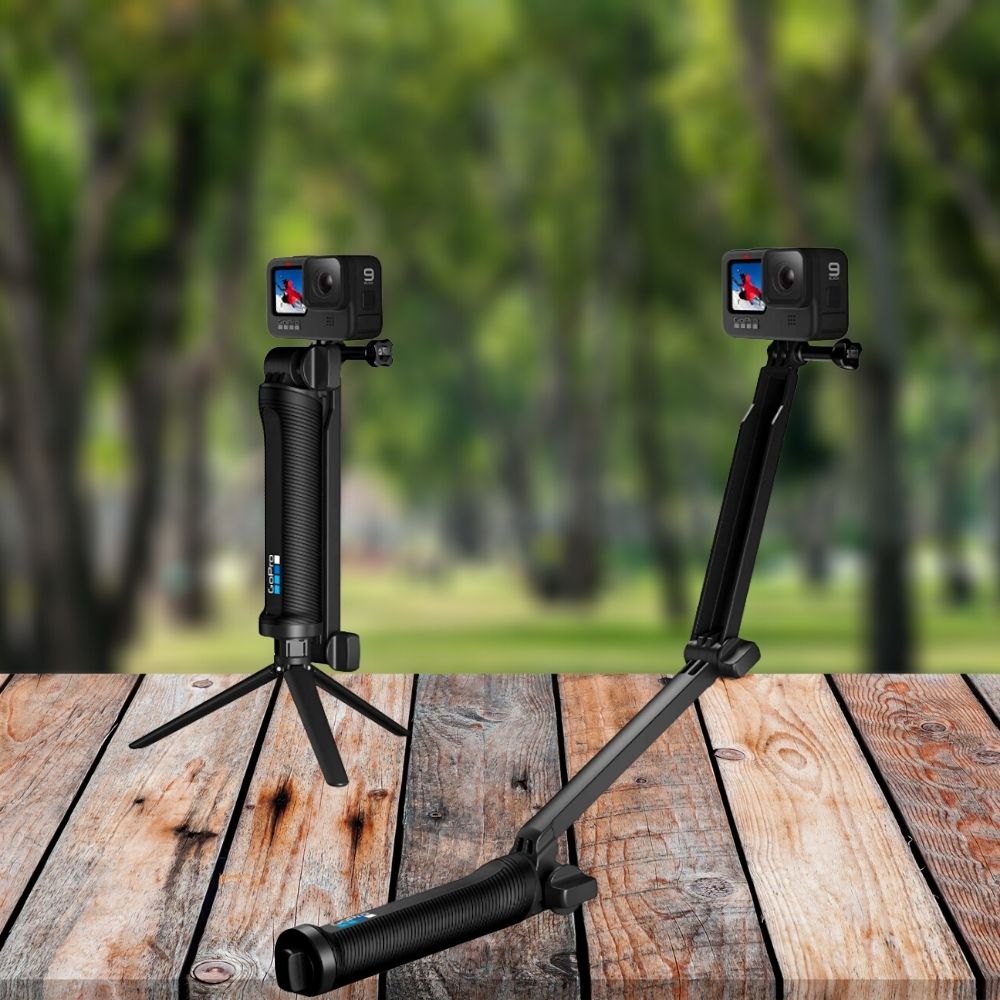
The use of a GoPro is great when you can really capture your surroundings. This is better done with a selfie stick which comes in many shapes, sizes, and lengths.
We utilize a generic GoPro 3 way arm stick that you can configure in many ways. And the best thing is that if you extend the 3-way arm correctly, you won’t even see the stick in the shot!
Video Microphone Rode VideoMicro
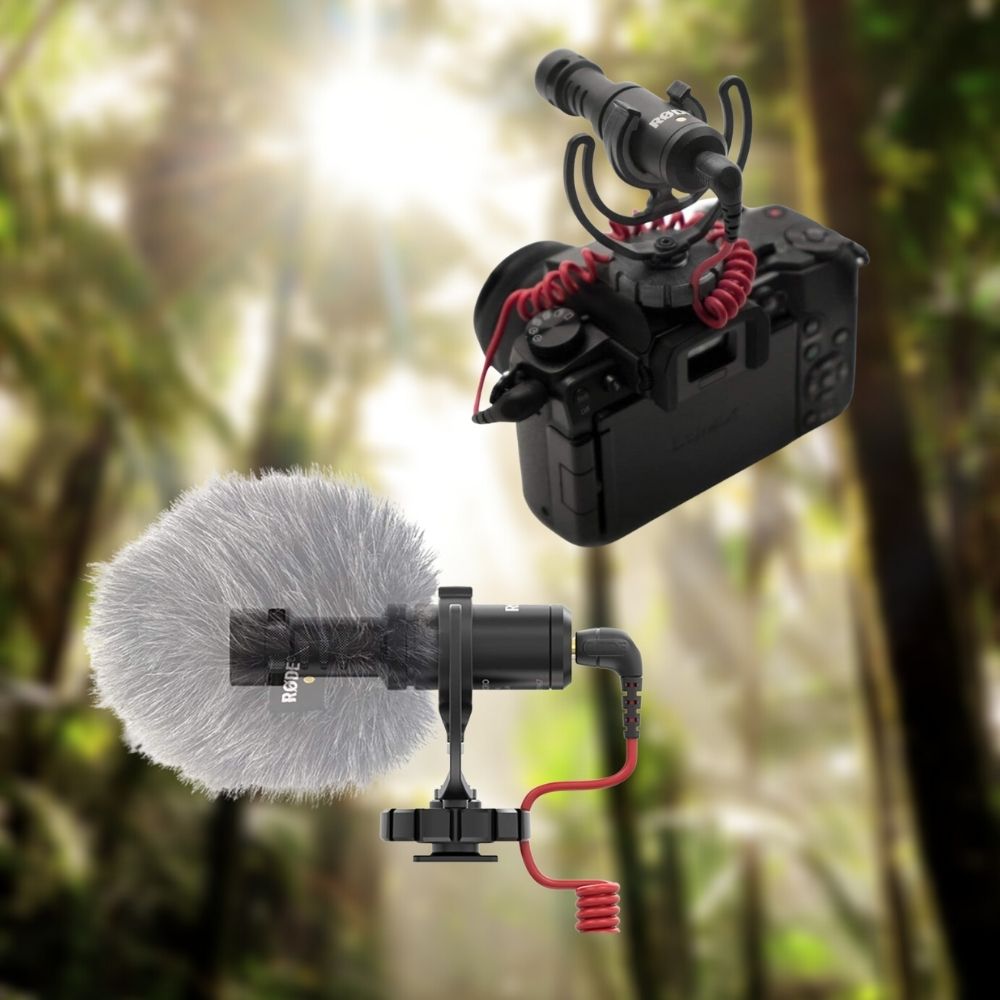
This compact microphone is ideal for any daily video work. It is quick to set up and ready to go by just plugging in the 3.5mm jack wire to your camera, screwing on the base to the hot shoe of your camera and you’re good to go.
The biggest win factor was the no battery feature because the microphone powers itself from the power of your camera.
The microphone comes with a dead cat windbreaker allowing you to capture smooth uninterrupted sound in windy conditions. You can remove the dead cat when you’re not in windy conditions.
The unit weighs next to nothing so it’s light on your back when put in a backpack. The microphone comes with a Rycote Lyre Shock Mount which absorbs the sound of any bumps and thuds that could potentially ruin your audio.
| Tip: Make sure to have the dead cat fit properly when mounting it. There is a groove on the microphone where the dead cat sleeve sits which will help prevent it from shaking and causing audio disruptions in your recordings. |
We traveled all over Japan with this problem which resulted in our vlogs having bad audio. It was at the time of taking the dead cat out again that we realized that it wasn’t fit properly in the first place.
If you have phones that still have an audio jack, you can use the 3.5mm spiral cable provided and record voiceovers in a voice memo app.
The microphone is a cardioid condenser which allows you to record sounds where the mic is pointed as it doesn’t record sounds behind it allowing you to capture sounds of where the action is happening.
Wireless Microphone Saramonic Wireless Lavalier

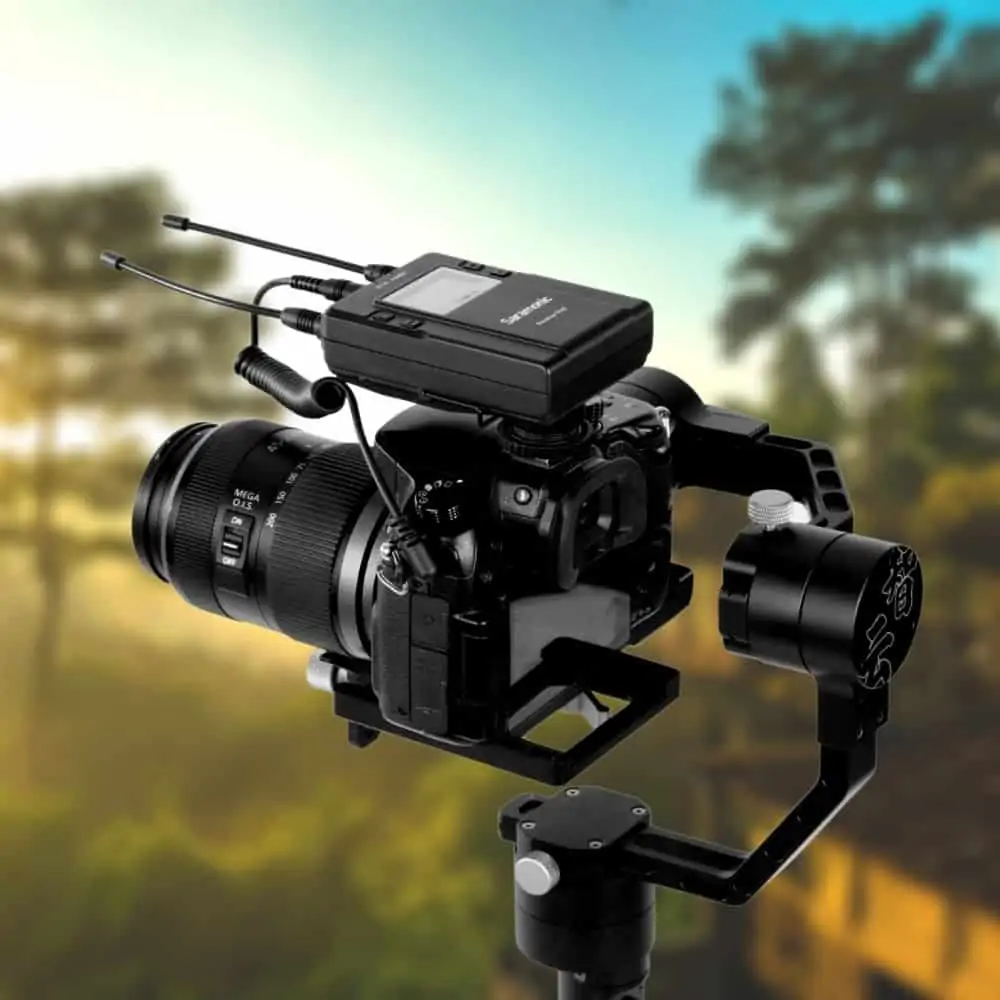
Use this for when you’re standing out of range from the on-camera microphone. We use this system with our sit-down videos that we publish to YouTube @WeWanderlustCo.
An on-camera microphone works when you’re within range of the mic but if you’re further back, this loss of sound really affects the video. Not only does the mic not pick up the sound efficiently but it captures the echoes of the room.
We solved this problem with the Saramonic Lavalier system which captures the sound right by the mouth and is quite helpful in mobile situations.
I remember seeing a range test and this thing can still transmit and receive audio as far as 300 feet away! I mean you don’t need to be that far from the camera but you get the point with the test and how reliable this system is. Pair it with some rechargeable lithium batteries and you’re set up like a pro.
There are other systems on the market like the Sony and Sennheiser which are industry leaders but the Saramonic does the job well in its price range
Phone Gimbal DJI Osmo Mobile 3
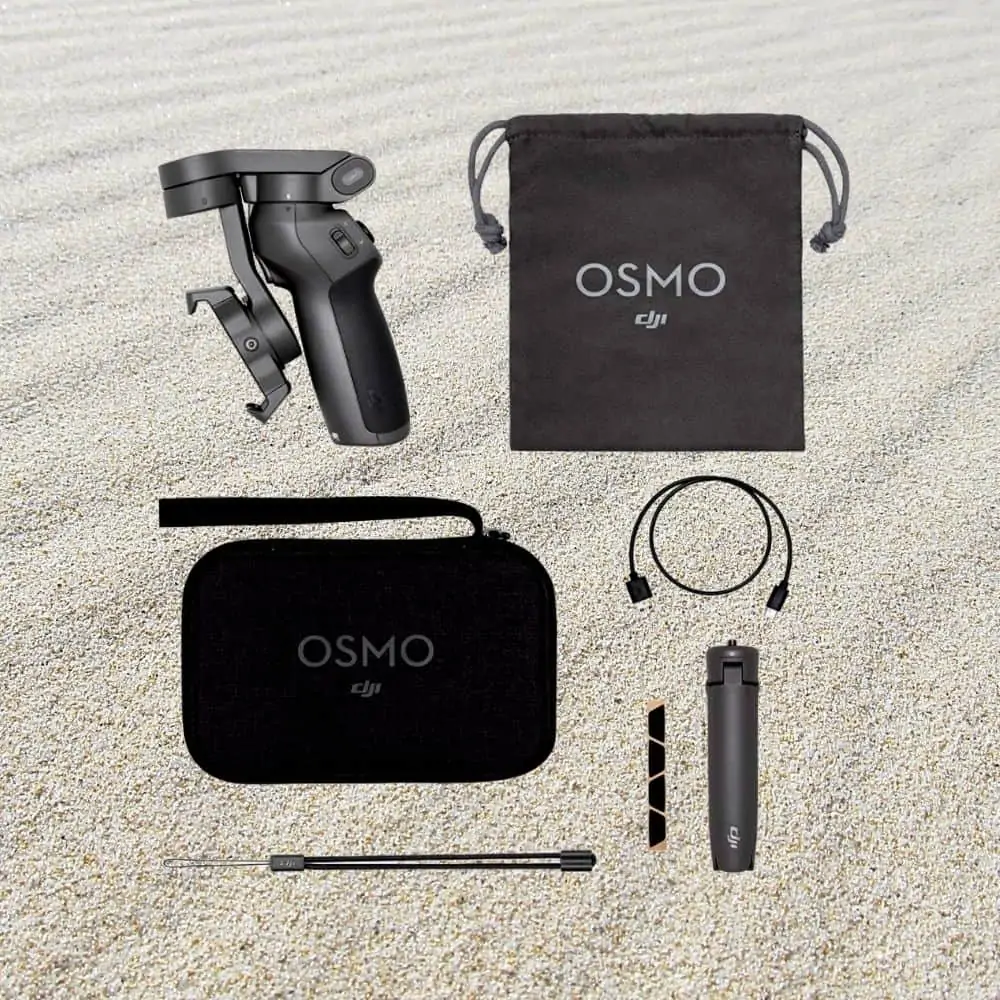
With the technological advances in phone cameras nowadays, it is sometimes hard to tell if something is shot on a camera or if it could very well be shot on a phone!
This is where DJI entered the market seeing the rapid innovation into smartphone cameras that led to it creating the OSMO Mobile gimbal. Anyone with this gimbal can pretty much shoot smooth steady shots without the jitters that you see with amateur videographers.
The OSMO line has undergone vast improvements since its release of the original OSMO Mobile which we owned.
The latest version which is the Osmo Mobile 4 has a magnetic snap-on feature that allows you to snap on and snap off your phone in seconds.
The stabilization on these gimbals paired with the stabilization built-in with your phones makes this a beast of a tool for filmmaking. We highly recommend this for anyone who would like to keep their filming setup minimal with their phone and a gimbal.
Power Bank Anker
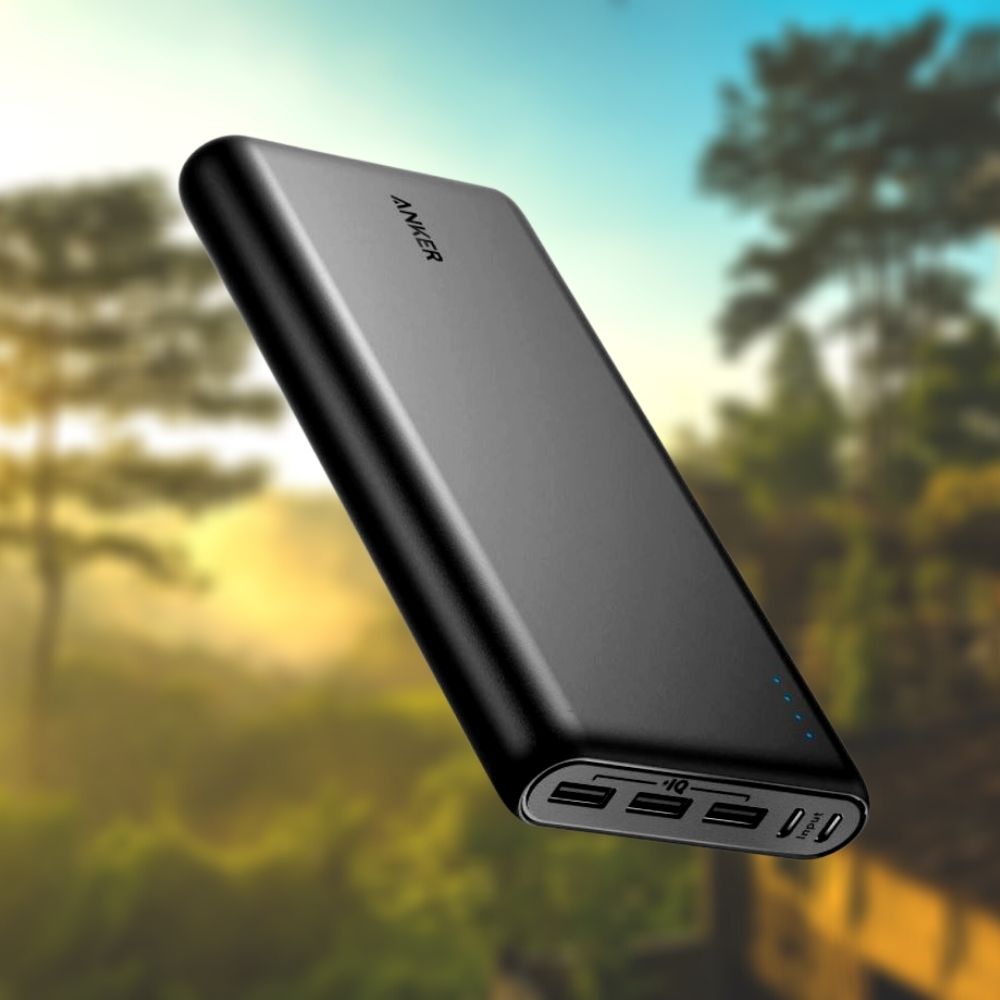
If you’re going to have all these gadgets and be creating awesome content, then you definitely would want to pick up a power bank to keep your electronics juiced up.
This is one of those things that you would thank yourself for throwing in your backpack and have it come to the rescue of your other electronics. It is great for charging up phones on the go, laptops (that accept USB-c charging), and other batteries, and powering your camera directly with the help of a USB cable.
The power bank goes a long way in providing power as the ampere rating on it is 25,600mAh, mAh standing for milliamp hours. Just know that the higher the number, the higher the capacity of a battery it is.
Anker does a good job of providing good power at a reasonable cost. There are other power banks out there that have some pretty high-capacity batteries but you’ll soon realize that it is just a marketing gimmick and that they don’t even hold that long of a charge.
Oben Carbon Fiber Tripod
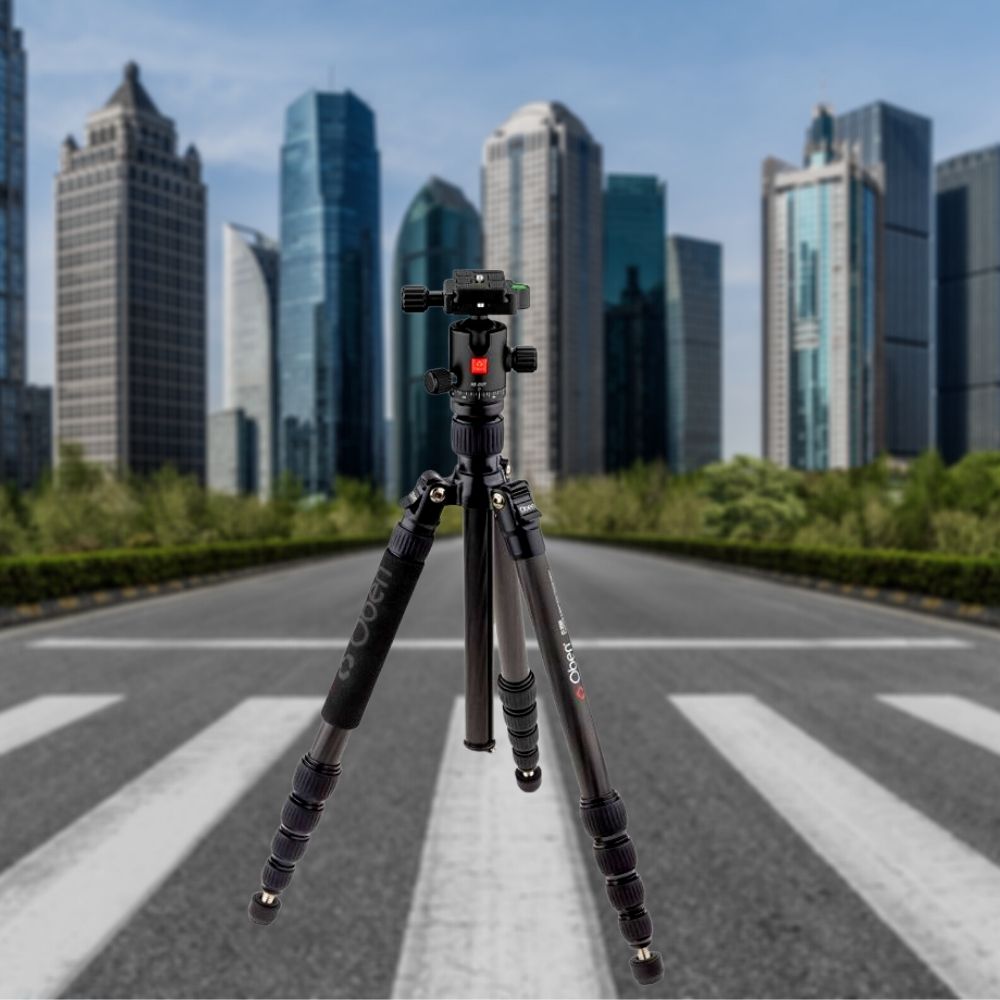
You’re on steady ground. That’s literally what the box says. We decided to pick this tripod due to its weight.
As travel content creators, when we do travel, we try to fly as light as possible. This is where the carbon fiber replaces our previous aluminum tripod which was missing a few screws. Imagine having a $3000 camera on a not-so-solid tripod.
Some of the advantages of this tripod to the others we were contemplating getting were the weight factor, length of the unit, and how we could have multiple uses for it. Well, the Oben appeared to check those boxes and we haven’t looked back on our purchase.
The length of the unit is foldable down to 16.6 inches and weighs around 3.2 lbs. It is perfect for a camera backpack as the size factor is minimal and easily fits in a tripod holder which most camera backpacks accommodate, and which the Lowepro backpack that we have has a pouch for.
Flexible Tripod (aka Gorillapod) Joby Gorillapod 3K Kit
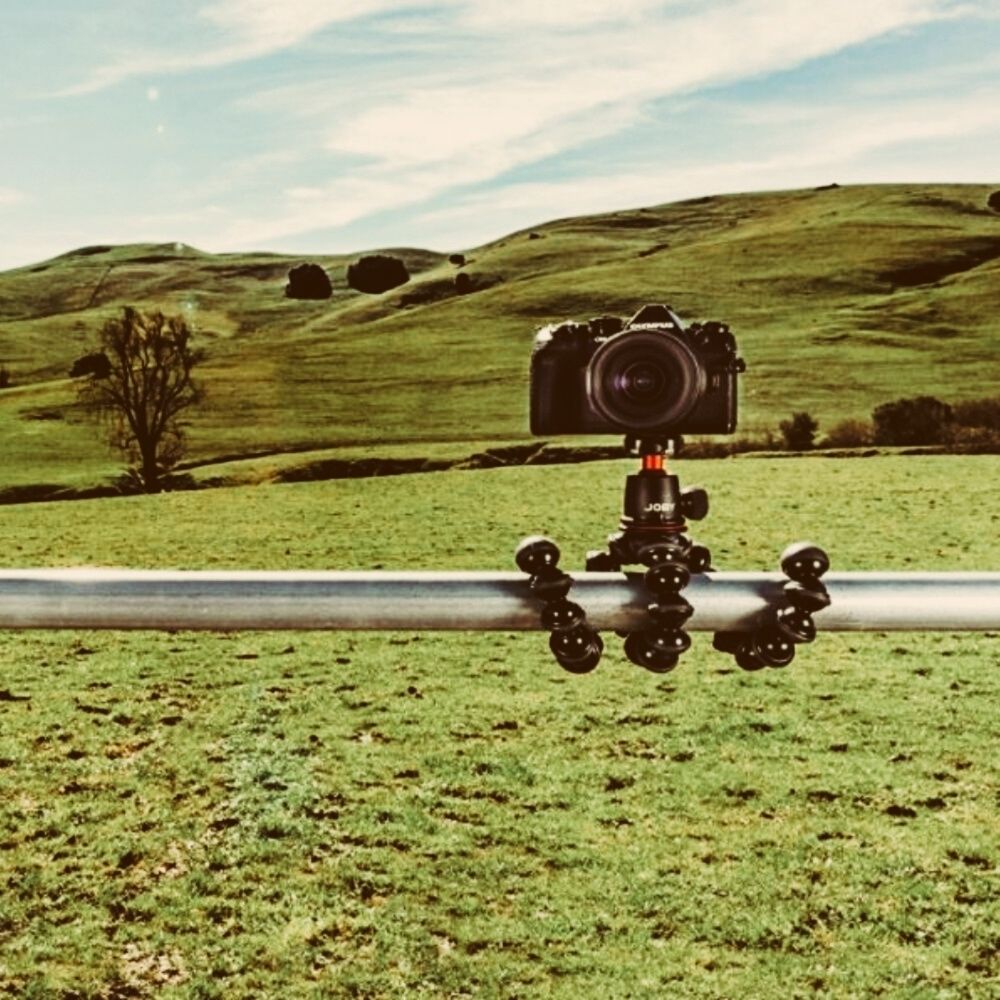
Gorilla pods really came to shine when the vlogging scene was taking off on YouTube.
A Gorillapod would allow you to set up your camera with an on-camera mic and you would be pretty much set to create whichever type of run-and-gun content you wanted. The versatility of this flexible tripod allows it to be set up anywhere, that is; a tree, on a chair, on a railing, set up as a regular tripod, and much more.
The possibility of this flexible tripod is up to the user. You can get creative and use it in places where a regular tripod would not be able to be set up. We used this gorillapod a lot in the Philippines and we have the perfect example of mounting this to a tree while driving by.
Phone Tripod
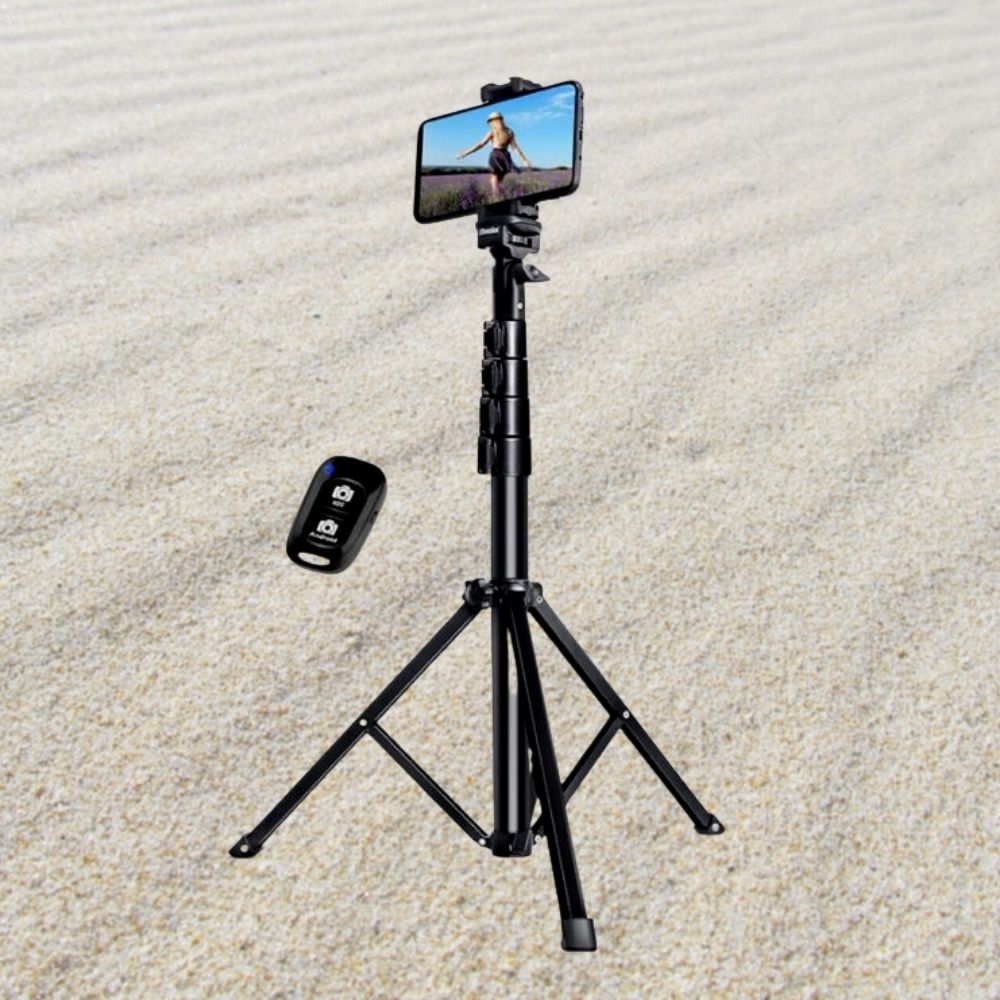
As we all know by now, you don’t need super expensive pro equipment to get started. Work with what you have!
We would highly recommend starting off with a phone and an affordable tripod (and maybe a phone gimbal). We have a selfie stick tripod which is good enough to be folded up and held in your hand for a quick selfie capture.
The tripod allows anyone with a smartphone to be able to shoot themselves anywhere they’d like. The small footprint of this slim and lightweight tripod allows you to be comfortable carrying it wherever you’d like without attracting too much attention.
It even comes with a Bluetooth remote that allows you to start recording or simply help you click pictures without running back to your phone after a timer has been set. Highly recommended for places where carrying a big camera wouldn’t be seen fit.
Mirrorless Camera Stabilizer DJI Ronin-S
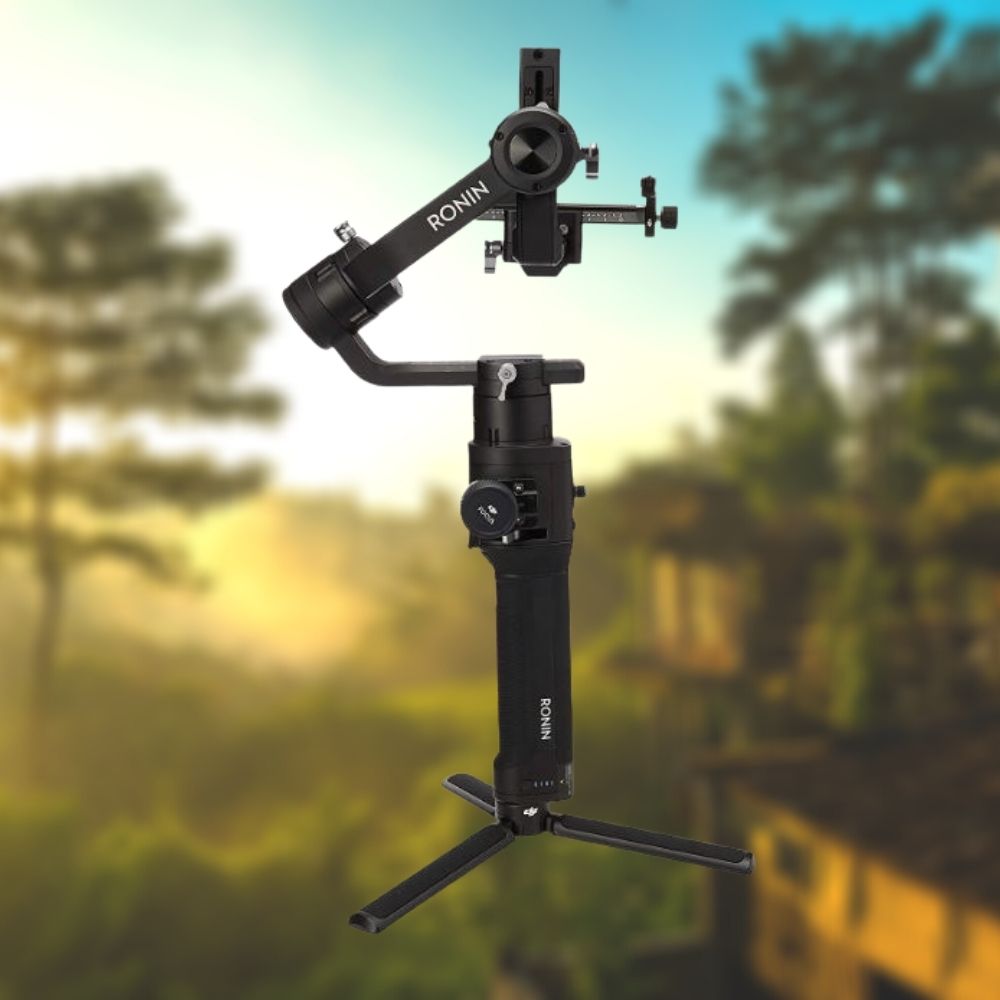
For those who want to take their videography skills to the next level, a motorized gimbal has to live in a videographer’s backpack.
It is one of those things that will help you smooth out your shots without the jitters that handheld footage normally brings. We decided to choose the DJI Ronin-S over the competitors because of its payload capacity.
While most other gimbals on the market have max payloads set to 3-4 lbs, the Ronin-S is able to handle a nice weight of up to 8 lbs. This weight allowance means you can mount a camera with a lens on, and even have an on-camera mount or other accessory and have the whole setup be rock solid knowing the Ronin-S would be able to handle it.
The Ronin app allows you to customize the motors to your liking. From stiff to cinematic smooth. It all depends on the type of shooter you are. The best feature is the auto calibration feature which we always use before we start shooting. This allows the gimbal to calibrate for the current payload and alignment of the 3 axes.
We used the ronin numerous times in our time in the Philippines which you can read up on HERE.
We always love to hear from you. If you have picked up one of these items based on our recommendation, let us know in the comments section below or connect with us on our YouTube Channel, or say hello to us on Facebook or Instagram
Stay Adventurous Friends,
Wherever you go, don’t forget to wander!
If you’re interested in learning about a visit to Dubai, don’t forget to read our blog here:
or read more on other topics below:?
- Ninh Binh Travel Guide for First Timers: Everything You Need to Know 2026
- Vietnam Apps: 9 Best Apps for Travelers in Vietnam
- Where to Stay in Kyoto Japan: My Top Areas & Hotels in 2026
- How to Get from Ninh Binh to Hanoi: Exactly How We Did It + What I’d Change (2026)
- How to Take a Luxury Van from Hanoi to Ninh Binh: My Complete Guide in 2026